Photo Tips for Better AI Age Progression Results
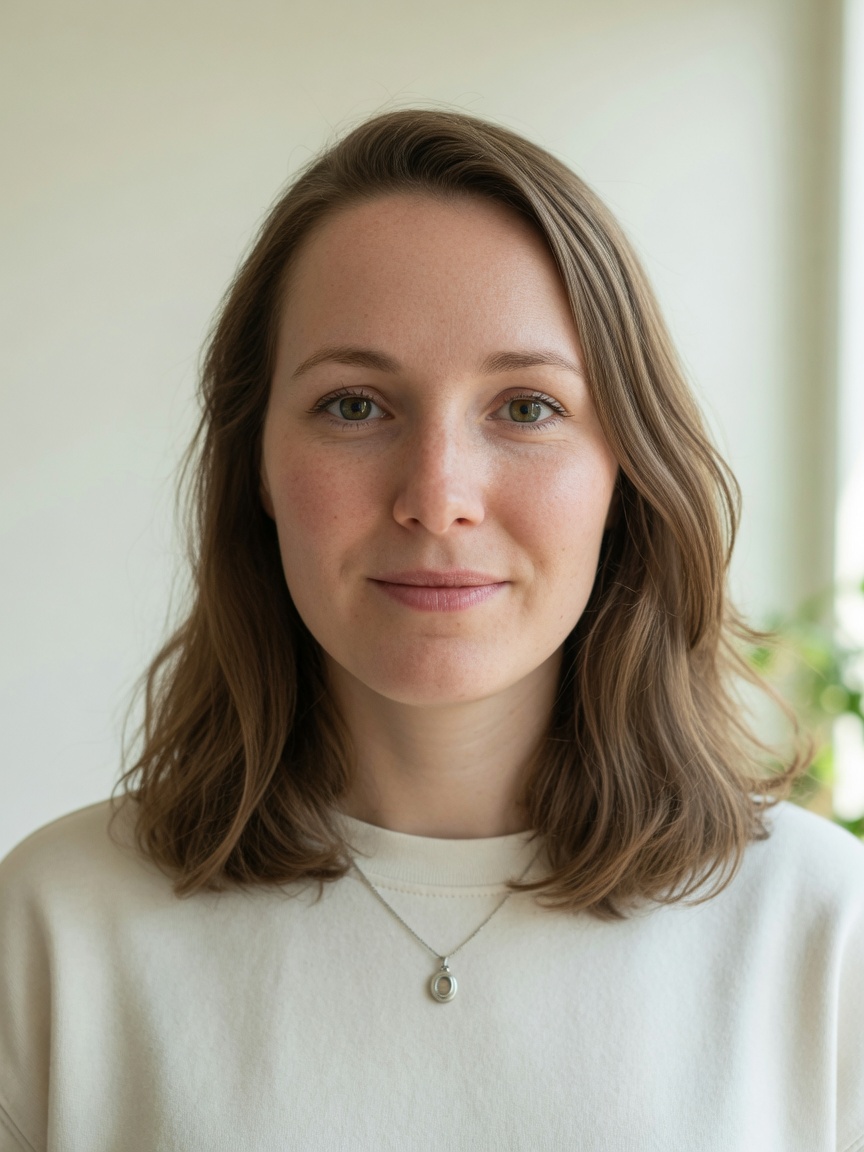
Use a clear front-facing portrait with even light, one face, and a vertical crop so AI age progression keeps your likeness.
The fastest way to get better AI age progression results is a better source portrait, not another filter. AI age progression is a portrait technology that generates an older or younger look from a single photo while preserving recognizable facial identity. A front-facing portrait, balanced light, a single subject, and a vertical crop will beat almost any post-processing tweak. When a model cannot read your facial structure clearly, it defaults to a generic older or younger face.
Key Takeaways
- Single front-facing portraits with eye-level camera angles preserve the most facial landmark data.
- Diffused, even lighting prevents directional shadows that algorithms misinterpret as premature wrinkles or volume loss.
- Heavy beauty filters and aggressive skin smoothing wipe out the natural texture models need to project realistic aging.
- Framing source images in a vertical 9:16 crop under 8MB in JPG, PNG, or WebP ensures optimal preview alignment.
- Testing moderate age steps near your actual age yields more convincing likeness retention before trying late-life presets like 72 or 88.
This guide matches the capture conditions used for the demo portraits in the AI age progression tool. You can browse sample transformations freely. When you're ready to upload your own photo, sign in with Google. No credit card is required to start.
For an honest breakdown of what these previews can and cannot predict, read how accurate is AI age progression.
Quick checklist
A clean input photo matters more for likeness retention than any generative setting or filter tweak. Matching your photo to standard identity guidelines before generating produces clearer likeness retention than tweaking sliders.
| Do | Don’t |
|---|---|
| Front-facing face, camera near eye level | Extreme side profiles or top-down angles |
| Soft, even light across both sides of the face | Harsh overhead noon sun or split side light |
| Single subject with the face filling the frame | Group photos where your face is tiny or cropped |
| Eyes clearly visible with a neutral expression | Sunglasses, hands covering the mouth, or props |
| Natural skin texture with pores intact | Heavy beauty filters that reshape the jaw or eyes |
| Vertical 9:16 portrait crop in JPG, PNG, or WebP | Low-resolution screenshots or heavily compressed files |
These rules match the setup behind the homepage gallery demos, including the default sample portrait. If your upload looks less like you than the sample slider, review this checklist before changing target ages.
Capturing facial images for machine analysis is a standardized process. In ANSI/ASTM E3115-17, Standard Guide for Capturing Facial Images for Use with Facial Recognition Systems, standards organizations established strict criteria for pose, illumination, and framing. Consumer age models follow the same fundamental principle: an algorithm can only project features from landmarks it can clearly identify.
1. Framing: fill the frame with one face
Cropping tightly on a single head and upper shoulders gives the model the facial landmark resolution it needs. Age transformation models analyze key facial landmarks, including the corners of the eyes, the nasal bridge, the mouth, and the jawline.
When a face is small or lost in a wide background, the signal weakens. Weak signal leads to generic wrinkles and loss of identity.
- Leave a little headroom above the hair and avoid clipping the chin.
- Crop into a vertical 9:16 aspect ratio because the workbench preview and downloadable posters are built specifically for tall portraits.
- If your source image is a wide travel picture, crop it down to a solo portrait before uploading.
- The tool accepts uploads up to 8MB, so you can keep high resolution while removing background clutter.

2. Angle: aim for a passport-style front view
A direct, front-facing angle at eye level preserves the symmetric landmarks required to keep your likeness intact. While a slight three-quarter view can work, a hard profile hides half the facial geometry.
Official UK passport photo guidelines require applicants to be facing forwards and looking straight at the camera. Biometric systems enforce this rule because asymmetric perspective introduces geometric ambiguity.
- Keep the camera at eye level so proportions remain natural.
- Ensure both eyes and both ears or cheekbones are equally visible.
- Avoid steep downward selfie angles that exaggerate the forehead and shrink the lower face.
- If possible, take the photo with a rear camera at arm's length or set a timer rather than using an ultra-wide selfie lens up close.
3. Lighting: even light beats dramatic mood
Soft, balanced illumination across both sides of the face keeps shadows from being misinterpreted as artificial wrinkles. Generative models interpret darkness around the nasolabial folds, tear troughs, and cheeks as volume loss and aging.
Strong directional shadows prematurely age areas that are naturally smooth, or hide genuine facial contours.
Prefer
- Facing a large window on an overcast day.
- A diffused front light or ring light positioned slightly above eye level.
- Balanced fill light that eliminates deep shadows beneath the chin and brow.
Avoid
- Split lighting that leaves one half of your face in deep shadow.
- Overhead noon sunlight that casts dark circles under your eyes.
- Harsh backlighting that turns your face into an underexposed silhouette.
- Saturated colored club lights that distort natural skin tones.
Official passport standards explicitly mandate that portraits must not have any shadows on your face or behind you. If your result looks patchy or unexpectedly weathered, fix the lighting setup before blaming the model.
4. Skin and makeup: keep texture honest
Unfiltered skin texture provides the baseline biological cues that aging models need to project plausible changes. Aggressive beauty filters that blur pores, slim jaws, and enlarge eyes remove the unique structural details that make your face recognizable.
When you upload an over-smoothed face, the model cannot distinguish genuine facial lines from digital artifacts. Passport photo regulations require portraits to be unaltered by computer software.
A 2021 systematic review and meta-analysis in Scientific Reports identified wrinkling as the primary skin-aging phenotype in clinical literature. When a smoothing filter erases natural micro-texture, the model lacks the foundation needed to synthesize realistic maturation.
- Turn off portrait beauty modes and smoothing filters on your phone.
- Matte foundation works better than shiny or glittery makeup that creates hot spots under light.
- Natural texture, including fine expression lines, helps the algorithm age your specific features rather than pasting on a stranger's face.
5. Accessories and hair: clear the facial canvas
Keeping eyes, brows, and facial contours unobstructed prevents generative artifacts and identity distortion. When accessories or stray hair obscure major facial landmarks, the model has to guess what lies beneath.
| Element | Recommendation |
|---|---|
| Eyes | Remove sunglasses or tinted lenses; clear prescription glasses are fine if eyes remain fully visible |
| Eyebrows and forehead | Style bangs or hair so the brow arch and upper face remain visible |
| Hair volume | Pull hair back slightly if it covers the jawline or cheek contours |
| Accessories | Remove hats, beanies, face masks, and heavy headphones |
| Hands and props | Keep hands, phones, and drinks away from the chin, cheeks, and mouth |
Official passport rules share these exact constraints: eyes not covered by the frames or any glare, reflection or shadow, and clear visibility of the full face. Facial hair such as beards and mustaches is completely fine as long as the jawline's general boundary remains clear. Costume accessories or novelty items distract the model, steering results toward caricature rather than a recognizable personal progression.
6. File quality, format, and 9:16 framing
Clean source files in JPG, PNG, or WebP format under 8MB ensure maximum sharpness across the 9:16 preview canvas. Sharpness gives generative networks clear edges to track during feature transformation.
The Face Analysis Technology Evaluation (FATE) Quality project at NIST evaluates algorithms that score facial images for specific defects: blur, pose deviation, occlusion, and non-uniform lighting. In generative age transformation, those same defects cause identity drift and strange artifacts. A blurry input produces a muddy, plasticized age output.
- Upload original camera files instead of re-compressed social chat exports or tiny screenshots.
- Never photograph a computer monitor or printed picture, as moire patterns and surface glare confuse the generator.
- Vertical 9:16 framing matches the web application's interactive comparison view, avoiding unexpected cropping of your hair or chin.
- If your image file exceeds the 8MB limit, resize the dimensions slightly in photo software rather than compressing it into a low-quality thumbnail.
7. Choosing target ages that look natural
Testing moderate age shifts of 10 to 15 years yields more convincing likeness retention than jumping straight to late-life extremes. Moving from age 25 directly to age 88 is an extreme leap. While dramatic, large jumps amplify subtle photo flaws and increase the likelihood of generative artifacts.
The interactive tool provides one-click presets for ages 18, 35, 50, 72, and 88, plus sliders for current age (6–90) and target age (6–100). In comparison, the homepage showcase gallery features curated transformations across ages 25, 45, 60, 65, 70, 72, and 80.
Try a structured step-by-step approach:
- Set your current age accurately using the slider.
- Select a target age roughly 10 to 15 years older or younger to verify that core facial features remain stable.
- Explore wider leaps (such as the 50, 72, or 88 presets) once likeness is confirmed.
- Toggle between Future Self and Younger Me modes depending on your goal.
Future Self adds textural detail and volume shifts, while Younger Me smooths contours and softens mature lines. Both modes demand the same high standard of source photo quality.

8. Comparing results and sharing responsibly
Evaluating your result alongside the original portrait on a split slider helps you judge true likeness rather than superficial aging effects. In the tool workbench, the before/after slider places your current look (Now) on the left and your target age on the right.
Slide back and forth to inspect eye position, nose shape, and ear geometry. The goal is recognizable continuity, not just added wrinkles or grey hair.
- Once satisfied, you can download a high-resolution share poster featuring the split comparison.
- When sharing online or presenting to friends, frame the image honestly as a creative future-self preview, not scientific forecasting.
- Respect personal privacy: only process photos of yourself or individuals who have given explicit permission.
- Read how accurate is AI age progression to understand biological aging factors like genetics, sun exposure, and lifestyle that single photos cannot predict.
- Review the Privacy Policy for data handling: when live generation is on, the server forwards the portrait to WaveSpeed to create the preview and does not store it in our product database.
Common problems and fixes
Most generation issues stem from photo capture flaws rather than model limitations. Addressing the root cause in the source photo resolves the problem faster than repeating runs on an unsuitable image.
| Problem | Likely cause | Fix |
|---|---|---|
| Face looks like a complete stranger | Aggressive beauty filters or an extreme side profile | Retake a straight front-facing portrait with natural, unedited skin texture |
| Plastic, waxy, or melted skin appearance | Over-smoothed input photo or an extreme age leap | Ensure real skin pores are visible and test a moderate age preset first |
| Preset samples work, but your upload fails | Low resolution, heavy compression, or face too small | Frame tightly in 9:16, improve lighting, and upload an uncompressed file up to 8MB |
| De-aged preview feels artificial or uncanny | Heavy de-aging combined with existing phone retouching | Raise target age toward mid-twenties and use a photo with no makeup smoothing |
| Warped facial features or strange double elements | Multiple faces or hands touching the face | Crop down to a single person and keep hands away from facial contours |
A five-minute portrait workflow
Following a repeatable five-minute capture routine ensures consistent results every time you generate. You don't need professional studio equipment, just a few minutes and mindful positioning.
- Position yourself facing a window with soft, natural daylight on an overcast day, or use an eye-level diffused lamp.
- Hold your phone at eye level at arm's length, or mount it on a stand and use the rear camera timer.
- Keep a relaxed, neutral facial expression with both eyes clearly open and hair pulled back from your forehead and cheeks.
- Crop the photo to a vertical 9:16 aspect ratio, ensuring your face and upper shoulders fill most of the frame.
- Export as a crisp JPG, PNG, or WebP file under 8MB.
- Visit the AI age progression tool and browse the sample transformations.
- Sign in with Google. No credit card is required to start.
- Upload your portrait, confirm your current age, and pick a target age preset (such as 35, 50, or 72).
- Generate your preview, examine the before/after slider for identity continuity, and download your share poster.
- If the likeness drifts, consult the Photo tips summary on the homepage or adjust your lighting before re-uploading.
Sources
The capture and quality principles in this guide draw on published biometric standards, government passport specifications, and dermatological research:
- Get a passport photo - GOV.UK. Digital photo standards: face forwards, eyes visible and unobstructed, no shadows, no other people, unaltered by computer software.
- ANSI/ASTM E3115-17, Standard Guide for Capturing Facial Images for Use with Facial Recognition Systems - NIST OSAC standards library. Technical guidelines for facial geometry and capture conditions.
- Face Analysis Technology Evaluation (FATE) Quality - NIST. Independent benchmark evaluating algorithms that score face image quality defects.
- Defining skin aging and its risk factors: a systematic review and meta-analysis - Scientific Reports, 2021. Analysis of clinical risk factors identifying wrinkling as the primary skin-aging phenotype.
Bottom line
Input photo quality determines whether an aging result retains your personal likeness or degrades into a generic face. Better source photos consistently outperform generative filter tweaks. When you provide a single, front-facing portrait with even illumination, natural skin texture, and clean 9:16 framing, the algorithm can read your real geometry and project an older or younger version that remains unmistakably you. Sign in, upload a clean shot, and test your future self with realistic expectations.